Category Archives: Feeding

Does My Baby Need Water? Introducing Cups and Drinks

When the weather gets warm, parents often wonder and worry about their baby’s hydration. During an infant’s early weeks, parents are warned that water is dangerous for babies, so the very idea of putting water in a cup or bottle makes parents nervous even beyond the newborn stage. However, midway into your baby’s first year, offering water in a cup for fun and practice will be a learning activity that helps keep your baby cool (and wet!). What should you know about offering water to your young child?

From birth – 3 months:

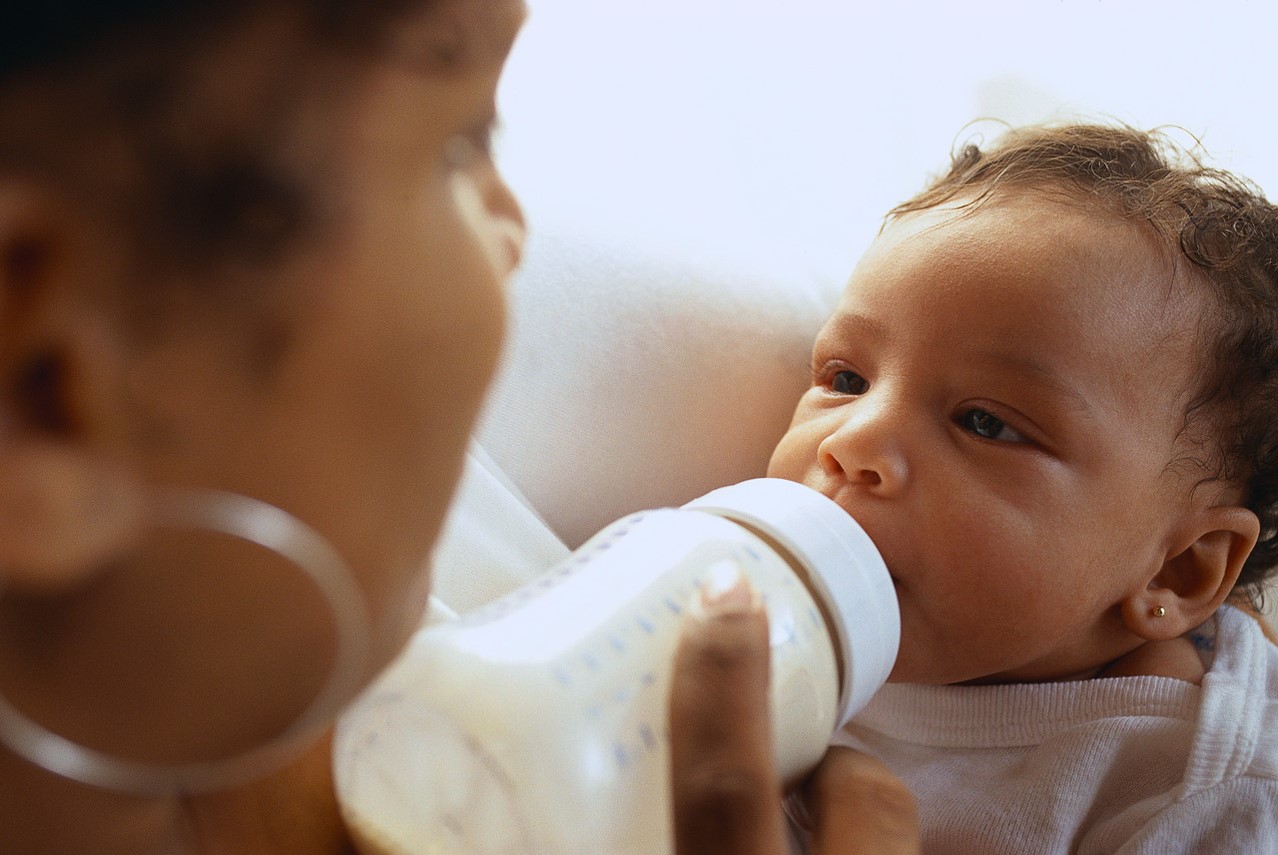
No water for newborns. Newborns have tiny bellies, so a bottle of water would take the place of important milk calories needed for growth and development. And because a newborn’s body is small, too much water can alter the normal electrolyte balance necessary for heart and brain functioning. Bottom line, newborns should not be given water. Breastmilk or properly mixed formula will provide the correct balance of liquids needed for hydration and thirst, even when the weather is very hot.

From 4 – 6 months:

Not dangerous, not necessary. An ounce or two of water once a day at this stage isn’t dangerous, but isn’t necessary either. Breastfed babies may nurse for very short periods of time during hot weather, when they are thirsty (rather than hungry) and research shows that even in tropical environments when the weather is above 100°F every day, breastfed babies do not require any additional liquids. For formula fed babies, check with your pediatrician for recommendations. Some pediatricians will suggest offering an ounce or two of water in a bottle if the weather is very hot while others say stick to formula only. Water should not take the place of a breast or bottle feeding, and formula should never be diluted beyond the proper mixing directions in order to offer additional water.

Around 5 – 7 months:

Introducing a cup:
At this age, babies are interested in holding and mouthing objects, and may be ready to explore the skills of drinking from a cup. Choose a sippy cup without a valve initially, so that the cause and effect of tentative sucking pays off with an easy result of water. Pick a small-sized cup of 4 – 6 ounces, because it’s best to fill the cup all the way up to the top so that your baby won’t need to tilt the cup all the way up and lean her head back in order to get water (that’s a lot to coordinate)! A larger cup filled all the way up becomes too heavy for small hands to hold and easily manipulate. Make sure your baby is in a supported upright position when given the sippy cup. Your baby might cough and splutter a bit but will soon learn how to coordinate the sucking and swallowing required for drinking. Your baby might also enjoy squirting the water out of her mouth, and getting wet is part of the process. You can also offer sips from an open cup with assistance.
Water at this age is just for fun and practice. Your baby will still receive full hydration (and nutrition) from breastmilk or formula. Once started, common baby foods including pureed fruits and vegetables are also very high in water content and will add to their liquid intake.

What to put in the cup? Water! Just water.
Give your child a taste for water from early on. Water is the best and healthiest drink for children and adults. Filtered tap water is usually a safe and healthy option. Check with your area’s Department of Public Works to find a link to your town’s water source if you have concerns about lead or other contaminants, or want to know how your water is sourced or tested. Information about fluoride will also be publicly available. Bottled spring water and “nursery water” adds additional expense and environmental waste that may be unnecessary if your tap water is safe for drinking. If it is suggested that you boil water for cooking or drinking, bring to a boil for only 3 minutes, which is long enough to kill bacteria but short enough so as to avoid concentrating any minerals that might be in the water.

What about juice? Wait to introduce, then use sparingly if used at all.
Juice is really just Nature’s Kool-Aid and ounce per ounce, actually contains the same (or more!) sugar and calories than Coke and Pepsi! Sure, juice contains natural fruit sugar, but it’s still just sugar (and a lot of it), adding up to considerable extra calories without offering any significant nutritional benefits. Juice also bathes tiny teeth with sugar and can lead to dental cavities, especially when a sippy cup or bottle of juice – even diluted juice – is sampled frequently throughout the day or night. The concentrated sugar load in undiluted juice can also cause diarrhea or diaper rash.

Think of juice as a treat or add-on, but not as an important part of your child’s daily intake. When used, limit daily juice intake to 4 – 6 ounces a day in total, and dilute juice by 50% (for example, 2 ounces of juice and 2 ounces of water). Even though this reduces the total amount of sugar and calories, it’s still a sugar bath for the teeth.

A good approach is to put only water in a sippy cup for daytime use, and save milk or diluted juice to use at the table during meals, while practicing drinking from an open cup. Keeping to this policy of “only water in the sippy cup” will save you the unpleasant discovery of finding a sippy cup of moldy juice or milk that has rolled under the couch! (And hopefully you find it before your toddler does!)

Interested in this topic? Watch my webinar on introducing cups, straws, milk, “milks”, juice and water (also Baby-Led Weaning is covered in this webinar too)

The Gassy Baby: Such Digestive Drama

“Why is my baby so GASSY?”
Is your young baby gassier than the average baby? Most newborns are both gassy, and dramatic about it, with lots of grunting, straining, arching, thrashing and tooting, and so it’s not surprising that most moms believe their new baby must be “gassier than normal”.

If your baby is gassy, it’s probably not from something in your diet, nor a sign he wasn’t burped enough after a feeding. Intestinal gas is a normal byproduct of food or milk digestion rather than from air swallowed while eating or crying. Most swallowed air will eventually come up as a burp (sometimes with milk attached) either with or without your help.

The Gastrocolic Reflex – or –  Why young babies are squirmy, grunty, gassy little people who are dramatic about their digestion

Most newborn gastrointestinal distress is caused by the sensations of motility, called the Gastrocolic Reflex, rather than gas. These peristaltic wave-like muscle contractions of the stomach and intestines propel stomach contents and stool through the small and large intestines. The gastrocolic reflex is triggered when your baby begins swallowing during a feeding and the stomach receives the milk. Inch by inch, the entire GI tract begins to wake up and contract, all the way from the stomach to the rectum. This is why babies may get squirmy or fussy 5 or 10 minutes into a feeding, and why feeding often prompts a bowel movement in a young baby.

Young babies are still getting used to the strange sensations (and products) of digestion, and aren’t shy about letting you know it. Once you see the “contents under pressure” explosion of poop some babies produce, it’s not surprising that they may react to the feeling of contents moving through their intestines at such high velocity with some distress.

Gentle Tummy Pressure can help: 

  1. Try laying your baby tummy-down across your lap, with her face turned to the side, so that her tummy is gently resting against your thigh. Pat or rub her back.
  2. Do you have a yoga/gym/physioball? Stabilize the ball and place a small receiving blanket over it, then carefully lay your baby tummy down over the ball on the blanket. Keep both hands on your baby, and rock your baby gently forward and back.
  3. The “colic hold” – drape your baby over your arm so that her face is supported by the inside of your bent elbow, and your hand is supporting her side and thigh between the legs. Her belly should be resting against your forearm. Gently press your arm, and baby, in towards your body, applying gentle tummy pressure, and either walk or sit on a physio ball and bounce.

Tummy massage for gas

  • Gently stroke your baby’s tummy from top to bottom using first one hand, then the other, like a waterwheel. Add your ‘whooshing” sounds.
  • Stroke from YOUR left to YOUR right – straight across, gentle but moderate pressure, just at or below the belly button.
  • Add the downward stroke, now moving across and down.
  • Flex baby at the hips and knees toward the tummy, gently press and hold in place, counting slowly to twenty. Repeat the entire sequence two or three times.

Many babies will pass gas during the exercise or have a BM a few minutes later – success and relief for everyone!

Is Burping Always Necessary?

I’m often asked about burping: when to try, how long to try, what if baby doesn’t burp?  Burping is optional, not mandatory every time for all babies, and your baby may or may not burp at any given session. Chances are, you’ll learn the ins and outs of your own baby soon, and will decide how important (or not) burping may be to your baby.

Though most young babies are “gassy” (ahem: Gassy Baby: Digestive Drama) this is only partially due to swallowed air that might come up with a burp. Much of the gas experienced (and passed) by infants is related to digestion and motility, rather than swallowed air. If you are trying for a burp for a minute or two with no luck, try another position (see below) or give up and continue with the feeding or next activity.

When breastfeeding, most babies don’t take in a lot of air (though some might, especially if there is a lot of on/off at the breast during feeding) and might not have a big burp to release. However, it’s worth trying for a burp most of the time. Sitting your baby up to burp after nursing on the first breast may help to rouse her for the second breast, helping her take in a little more milk. Then, burping after ending the feeding may help the milk to settle in her tummy and prevent extra spit up. Or not.

When bottle-feeding, it’s definitely a good idea to take a pause midway through the feeding for a burp, and at the end of the feeding as well. This helps to “pace” or slow down the bottle feeding, allows for additional interaction, and may help to reduce spit up.

Whether breastfeeding or bottle-feeding, use the baby’s natural pauses to time a burp break. Don’t pull away the nipple from a baby who is busy eating – she may protest, cry, and take in air, likely defeating your goal! Instead, when she begins to fall asleep, flutter-sucks with long pauses, or releases the nipple from her mouth, that’s a good time to try.

Try these favorite burping positions for newborns. In these positions, pat your baby’s back gently, or a little more firmly, or alternate pats and circle rubs on her back, while putting a little gentle pressure on baby’s tummy area.
And, baby may not burp – it’s ok!

  1. Resting with her tummy HIGH up on your shoulder (for gentle tummy pressure) with her head cuddled near your neck.
  2. Sitting upright (or slightly leaning forward) on your lap with her chin/cheeks supported in your hand. (this one is good for helping to rouse a sleepy baby)
  3. Laying tummy down over your lap with her face turned to the side.

A note about Spit Up:
Some babies tend to spit up a lot, with or without regular burping. If you have a spitter, you’ll know!
If your baby is a spitter, position a burp cloth, receiving blanket or small towel over your shoulder or lap when burping. It’s common for a mouthful (or more) of milk to come up with a burp, and this doesn’t mean your baby overfed. Expect to see more spit up, not less, by the 3rd or 4th month as baby is eating larger volumes and jiggling her body, arms and legs more.

Freaky Baby Things to Worry About

I spend so much of my time helping new parents understand and demystify normal baby behaviors to (hopefully) reduce their anxiety and concerns, while increasing parenting skills and confidence.  But just for fun, today I’ll just go ahead and scare you with a few freaky things that are serious enough to be real worries.

1. Hair Tourniquet.

A what? Yes, a Hair. Tourniquet. One of mom’s long hairs gets wrapped around baby’s finger or toe, cutting off circulation. (New moms – don’t be surprised when your hair begins mass shedding a few months after giving birth…) Baby’s finger gets swollen, cold and blue, but you can’t even see the culprit – the tightly wrapped hair – anymore because the finger swells around it, so parents usually have no idea why baby is screaming. Off to E.R. you go. The treatment? A nice dab of “NAIR” dissolves the hair quickly & safely without having to cut near baby’s swollen finger or toe.  If your baby is ever screaming inconsolably, after trying your usual approaches, take baby to the changing table and strip completely naked, then examine carefully, head to toe. Sometimes it’s as simple as a sharp corner of a diaper pressing into baby’s waist. But be sure to check those little fingers and toes for wrapped hair, and all the skin folds too.

2. Nail-Clipping Fail.

Nipping baby’s finger when clipping nails. Usually I’m all “Don’t worry about this; Don’t worry about that” so parents may be surprised when they tell me they nicked the baby’s finger and I’m not casual about it at all. A tiny cut at the tip of baby’s finger actually CAN be a big deal. Why? Baby fingers go everywhere and are very prone to infection. So keep your eyes on any cut around your baby’s finger or nail bed. Do warm soaks or compresses several times a day and watch the area closely.  If the fingertip becomes warm, pink or swollen and tight, call your pediatrician right away. This infection is called “Paronychia” and requires oral antibiotics to prevent a worsening infection. So if you have a little “oops” when clipping your baby’s nails, you don’t need to freak out, but do keep it clean and keep a close eye until it heals to make sure an infection isn’t setting in.

3. Febrile Seizures.

These are typically not serious in the big picture but can seriously freak out a new parent who has never encountered a febrile seizure before. Febrile seizures are most common in babies and toddlers between 9 months and 3 years.  Surprisingly, the seizure may occur at the very beginning of the fever when temperature is rising rapidly and may be the first sign of fever or illness in a toddler: a young child can go from playful to cranky to seizure in under an hour. It may be a relief to learn that febrile seizures are not related to epilepsy or lifelong seizure disorders. Keep your baby or toddler safe on a soft surface but put nothing in or near the mouth. Of course you’ll call your pediatrician after witnessing a febrile seizure, but these are usually able to be managed at home and are not a medical emergency. If the seizure is lasting more than 2 minutes, or if you are worried about your baby’s breathing, call 911.

4. Projectile Vomiting 3 times in a row.

Most babies spit up plenty, and many will randomly projectile vomit every once in a while just for kicks and giggles, but if the milk comes shooting back out quickly and with force after most feedings, that is different and concerning.  If a young baby projectile vomits 3 times  in a row,  call your pediatrician and pack your bags – you’ll be going to the hospital to have your baby evaluated for Pyloric Stenosis, a blockage between the stomach and the small intestine. This is more common in male babies, may be genetic, and most often occurs at around one month of age. Don’t worry about the rare, random projectile vomit episode, but if it’s frequent and persistent, call your doctor.

5. Nursemaid’s Elbow.

Radial head subluxation (official name, for medical-geeks) is a common injury in toddlers, caused by a simple tug, pull or jerk on the child’s arm. This can and does occur even during normal active physical play, like swinging a child by the arms for fun (not so fun in this case, and not recommended!) or if you quickly need to pull your toddler out of danger. Because infant and toddler joints are still quite loose, it’s relatively easy for the ligament to slip over the  radial head, making the elbow bone move out of place. Suspect a Nursemaid’s Elbow injury if you see that your toddler refuses to use one arm and keeps it tucked close to the body. There is usually no visible injury or swelling and very little pain as long as the arm is kept still.

I hope you’ll never need to know more about any of these issues, but at least this practical list of real-life concerns can take the place of Common Freaky Newborn Things Not To Worry About. You also may like to explore 12 Freaky Things You’ll Find in Baby’s Diaper During the 1st Year.


Pumping and Working? Here’s What to Pack

Heading back to work, messenger bag on one shoulder, breastpump bag on the other? There’s a surprising amount of extras to pack to make pumping at work more efficient!

What to pack in your pumping bag

  • Hands Free Pumping Bra: the Simple Wishes Hands-Free Bustier is truly a must have for those who pump regularly. Watch 5 Tricks for Better Pumping  to learn the benefits of hands-free, hands-on, double pumping.
  • Hand Sanitizer – alcohol-based, like Purell.
  • Medela Quick Clean Wipes – an easy way to clean pump parts between use, may also be used to wipe down a desk or table before expressing milk.
  • Enough milk storage bottles for the day (typically six are needed – one pair of bottles for each of three pumping sessions during a full work day) plus extra zip seal milk storage bags.
  • Lids. For some reason, moms often pack the bottles but forget the caps. Milk storage bottles don’t work so well without the lids!
  • Baby’s receiving blanket: Drape this over your lap when pumping to protect your clothing from drips, and to serve as a tactile reminder of your sweet baby.
  • Nursing cover-up, scarf or shawl for semi-private pumping locations (your cube, staff room, car in parking lot…).
  • Alternate Power Source: Extension cord or vehicle lighter adapter – Pumps that use AA batteries quickly begin to lose cycling speed and efficiency as the batteries drain down. It’s better to plug directly into the wall, or use the car battery (not while driving!) instead of an external battery pack, when possible. Pack spare batteries just in case. Pumps with internal lithium-ion batteries, like the Medela Freestyle, have the clear advantage here.
  • Non-perishable snacks or protein bars. Keep your bag stocked with high-protein snacks easy to eat with one hand.
  • Olive oil in a tiny Ziploc bag. Dip your clean finger in and lubricate the flange to reduce friction.
  • Large cooler to hold your milk and pump parts. Use several frozen water bottles as your ice packs – you can sip the ice water as it slowly melts throughout the day, while pumping.
  • Headset or earphones so you can make phone calls, listen to music or podcasts or participate in webinars (like my weekly baby chats!) while pumping.
  • Your keys or bus/train pass: store these in your cooler bag so that you cannot leave work without your day’s milk!
  • Packing List: Tape a printed checklist of everything YOU like to pack in your pumping bag, to take a quick audit when packing your bag for work each day – much less chance of forgetting something!


Home Visit Info (Boston or San Francisco areas)

Only By Direct Referral.

Home Visits for New Parents –
To help answer some logistical questions about a home visit, here’s some general information.

Who am I?
I’m a board-certified pediatric nurse (RN, CPN) as well as a board-certified lactation consultant (IBCLC), with over 25 years of experience helping new mothers, families and babies.

My areas of focus are maternal health and lactation, newborn and infant care and development, infant feeding (breast, bottle, solids) and newborn sleep. (Learn more Here and Here)

Initial Home Visit: During our consult, I will come to your home for about 2 hours, complete a detailed history, observe or assist with a breastfeeding and/or pumping session, including pre/post feeding weights with a highly accurate scale if indicated, answer all your questions, and together we will come up with a workable plan you are comfortable with. After the consult, I’ll email you a visit summary with reminders, suggestions and resources based on your specific situation. A check-in by phone or email is included after your visit, and Follow Up visits are available as desired.

Consultation Fees (San Francisco)
Initial Home Visit is $350
 for the initial visit (about 2 hours) including phone/text/email check-in.
Follow Up Home Visits are $250 and about 75 minutes.
Phone consults are $150 and 50 minutes.
Day, Evening, Weekend and Next-Day Appointments May Be Available

For questions or to schedule, leave a message at 617.803.5614. 

All consults, including phone consults, include a brief summary and resources, receipt for insurance or FSA reimbursement and a check-in by phone, text or email within several days of the consultation.

I do not accept insurance, however, your insurance company may reimburse you if your policy covers lactation visits. Clients are expected to pay by cash or electronic payment at the time of the visit. I will provide you with a detailed receipt appropriate to submit to your insurance company or Flexible Spending Account (FSA) to request reimbursement.

Please DO:

  1. Have baby’s weight history and any recent feeding, supplementing and pumping  app data or logs available. (If possible, email me any summaries ahead of time)
  2. Plan to have baby ready for a feeding about 30 minutes after the start of our appointment. I will want to collect information first – but – babies are not predictable! Don’t try to “hold off” baby for too long, we’ll make whatever the situation work.
  3. Have pump and pump parts ready to use in case we want to also observe/improve a pumping session.
  4. Plan for payment at time of visit (cash or electronic payment please).
  5. Your partner, friend or a support person is welcome to be present during our consultation.
  6. Keep pets in another room. I love animals, but they are often curious or anxious with a stranger in their home and near their “people”.
  7. We’ll visit and feed where you typically care for your baby, using your usual chairs, pillows and environment.
  8. If possible, have available: a cloth diaper or burp-cloth, a receiving blanket (thin cotton),  a firm bed pillow, and a small pillow such as a couch pillow or decorative pillow. Don’t stress over this though!

Please Don’t:

  1. Worry about clutter, laundry and dishes – your home should look lived in!
  2. Shower or dress yourself or baby specially for the visit.  Be comfortable.


Travel, Nursing and Pumping for the Working Mom

One of the biggest concerns for working women who express milk for their babies, is the dreaded overnight business trip. It may seem overwhelming, but expressing on the go, and bringing home every drop of milk to replace what your baby used in your absence, is doable with information and planning!

Meet Marie, a frequent flyer and marketing executive:

“I travel nationally about one week out of each month. I wanted to make sure that my daughter had enough breastmilk even when I was out of town, and I also wanted to protect my milk supply to continue breastfeeding as long as possible, for when I am home with my baby.”

“I returned to work when my daughter was three months old. It was a whole new mindset once I heard I could pump while away and still save and use every single drop of that milk. I hadn’t thought I’d be bringing home the milk itself, I’d been focusing on pumping to maintain my supply but thought I’d just have to dump the milk. As it turned out, I was able to bring home ALL the milk each time, including milk from a week in Mexico and once during a planned four day trip that turned into an eight-day marathon. My first big trip away was four days in Seattle when she was five months old, and my longest trip was eight days in California. I always needed to make sure I had enough milk in the fridge and freezer to last for the first three days while I was away, then I would “overnight express” frozen milk home on day 3 of my trip.* I traveled through countless airports and security checkpoints with my breastpump and cooler of frozen milk.”

You can do it. Here’s how!

In terms of business travel, you should be able to bring home all the milk you express while you are away. Plan to express about 6 times in 24 hours – every 3-4 hours during the day and once over night (or at bedtime). Here is an article

To travel with or ship large volumes of milk:

  • Pool each day’s milk into an empty 1 liter water bottle (s) and refrigerate in your hotel room. For extended stays or to ship home, it’s better to freeze the milk solid overnight. (You can place all milk bottles in a brown bag and ask the hotel kitchen to place in their deep freeze overnight).
  • Place frozen milk into a soft-sided cooler brought from home then pack any space remaining with crumpled newspaper as insulation.
  • You can carry this on the plane with your breastpump (just declare it) or pack it in your checked luggage.
  • On an extended trip, you can ship milk home overnight express. Place your frozen milk inside the soft sided cooler (use crumpled newspaper to fill any extra space in the cooler) then place the cooler into a sturdy shipping box. Fill the remaining space in the box around the cooler with crumpled newspaper for insulation and to protect the cooler from movement and ship overnight express. Milk should be frozen or only partially thawed on arrival and can be portioned out and used over the next several days or put directly back into the freezer.
  • For a shorter trip (1 – 2 days worth of milk), you can simply pack expressed milk (not frozen) in your soft-sided cooler, secure it and insulate it with crumpled newspaper, and use freezer coldpacks or a couple of frozen 1 liter water bottles to keep it cold.

**TSA security rules allow traveling with any volume of breastmilk, with or without the child present, as long as it is declared to security. TSA has modified the rules associated with carrying breast milk through security checkpoints. Mothers flying with, and without, their child are permitted to bring ice packs and breast milk in any quantity as long as it is declared for inspection at the security checkpoint.  I suggest you pack a printed copy of these TSA regulations in the bottom of your pumping bag. View TSA Regulations


Tips for Selecting a Bottle Nipple

Materials and shape

Despite bold marketing statements from manufacturers, no bottle or bottle nipple will work or feel like a mother’s breast.

Bottles are the milk containers. They vary in shape, size, material and features (some are vented, some are wide-necked), but what’s usually most relevant is the bottle nipple, and not the bottle itself. Bottle nipples are commonly available in either silicone or latex. Silicone bottle nipples are clear and firm. Latex bottle nipples are usually tan-colored and are a little bit softer and squishier than silicone. Your baby may have a preference.

Considerations when selecting a bottle nipple are the shaft length, the base of the shaft (that still fits in baby’s mouth), the material, and the flow rate of the nipple. Slow-flow bottle nipples may be labeled “slow flow”, “newborn”, size 0 or size 1, or by listed by age: 0 to 3 months.

Avoid bottle nipple shapes or latch positions that keep the baby’s mouth tightly pursed or encourage clamping or chomping to control flow. These behaviors don’t translate well when practiced back at the breast! A bottle nipple with a wide base may encourage your baby to keep her mouth open wide, with jaw dropped and lips flanged out like a fish.

Go with the Slow flow: Join the Slow Food Movement

For a breastfeeding baby, almost always, slower bottle feeding is the way to go. It should take about 15 to 30 minutes for a baby to do a “full” feeding from the bottle. The same 3 ounces of milk, offered with a slow flow nipple, will be so much more satisfying to the baby when given over 20 minutes using the slow flow nipple. If he guzzles the same 3 ounces of milk rapidly, in just 5 or 10 minutes, he may not seem relaxed and content at the end, so the caregiver will assume the baby is still hungry, and reach for more milk. In this way, a baby can plow through an alarming volume of milk in a short amount of time.

Slow Flow: Avoid creating a “Flow Rate Preference”

If a baby becomes accustomed to the instantaneous, rapid and easy flow of milk from the bottle, he may become impatient and fuss when needing to work and wait a bit more when at the breast.

Keeping the bottle flow slow and requiring the baby to suck for more than just a few minutes to get their full feeding may help reduce the risk of impatience when back at the breast.

Though people talk about “nipple confusion” – a related and significant issue is this “Flow Rate Preference”. Keep the bottle feeding slow, requiring time and work, in hopes to avoid this flow rate preference with negative consequences back at the breast. Maintaining a strong milk supply is another critical factor: a baby will soon learn to cry and wait for the bottle, if they work hard at the breast for little payoff.

When or why change to a faster flow?

There is no need to move to a faster flow nipple simply because your baby’s age is beyond the ages listed on the package. The flow rate controls the speed in which a baby can drink the bottle, and for breastfeeding babies, slower is almost always better.

It should take about 15 to 30 minutes for a baby to take a “full feeding” from the bottle. A full feeding may be about 2 or 3 ounces at 1-2 months, gradually increasing to about 4 to 6 ounces by six months. Just because a baby usually finishes a bottle doesn’t mean the milk wasn’t enough, or that he should be offered more. Drinking large volumes of milk too quickly may lead to a baby feeling less satisfied, even though the milk volume (meal size) was enough. Babies usually need lots of sucking time to feel content when bottle feeding.

Move to a faster flowing bottle only when an older baby is taking too long to drink a bottle (30+ minutes), or seems frustrated at the slower flow. There is no reason to move simply due to the age suggestions on the nipple package. A 6 month old can still use a 0-3 month bottle nipple. Many babies continue to use the newborn or stage one nipple all through their first year.

If your baby drinks a large amount of milk in a short time (under 10 minutes) and still does not seem satisfied, rather than assuming he needs more milk, consider switching to a slower-flowing nipple and also pacing the feeding by offering more pauses and breaks during bottle-feeding.

Different brands of bottle nipples will work differently, even if they are each labeled “slow flow” or “newborn”. Holding the bottle upside down to see drip rate is not an accurate way to assess flow rate. Most bottles will drip several times and then stop. Try for yourself with the bottle, nipple and water – take a few sucks from several different nipple sizes and brands. You’ll easily be able to assess flow rate differences!

Help, Baby Won’t Take the Bottle!

One of the biggest stressors for a new mom preparing to return to employment is the baby who WILL NOT take the bottle.

In my experience, there are two types of “bottle refusal” – Passive Refusers, and Active Refusers. A “Passive Bottle Refuser” will allow the bottle nipple into his mouth but then doesn’t really seem to know what to do with it – he may just chew or play around with it, rather than latch and transfer milk, and eventually will get frustrated, hungry or bored, and begin to fuss. The “Active Bottle Refuser” doesn’t want the bottle nipple in (or sometimes, even near!) his mouth, and will resist or protest attempts to feed him with the bottle: he may cry (or scream), arch, fight or pull away as the bottle nipple approaches or enters the mouth.

The Passive Refuser seems like he doesn’t know what he’s supposed to do with the bottle. The Active Refuser is angry and upset about the whole scenario!

If you have an Active Refuser, the first step is to reduce the stress and negative associations already established around bottle-feeding attempts. Avoid reinforcing negative associations with the bottle/nipple. If your baby is crying and fighting and trying to push the nipple out of his mouth, don’t keep pushing it back into his awareness: take a break or stop for that session. Forcing it on the baby, or making him gag and cry with the nipple in his mouth will not magically result into drinking from the bottle. It just reinforces the negative experience and makes the baby anxious the next time the bottle presented.

Here are a variety of suggestions that can be successful. Some may seem non-traditional, but when the usual suggestions aren’t working, sometimes you need to think out of the box.

Timing: Consider Morning, Not Evening

If the non-nursing partner is offering the bottle, try mornings rather than evenings. In general, everyone’s stress level is lower in the morning, and most babies are happier in the morning and grumpier in the evening. If the bottle isn’t going well, working on it during an already stressful time of day won’t help.

Positioning

Try some non-traditional feeding positions if the usual “sit, cuddle, feed” position isn’t working for you.

Up and Out: Hold baby in a sitting position, facing out against your chest, as you walk around the room, or better yet, walk around outside. Movement and distraction can be very helpful.

Bounce: Sit on a physioball (gym-, yoga-, birth ball) and bounce while offering bottle. Try both a cradled position and a facing out position.

Wear the Baby: Does baby like his carrier? Wear baby in the ERGObaby, Moby Wrap or BabyBjorn, walk around indoors or out, while offering bottle.

The “Disembodied Arm” Technique: Just what it sounds like! Have baby in a car seat or bouncer seat facing something distracting (television?). Sit behind baby, out of sight, with bottle coming around from behind.

Don’t worry that you’ll need to feed your baby using these unusual methods in the long term, we’re taking it step by step. The first step is to encourage baby to allow the bottle nipple into his mouth, latch and transfer milk effectively. Once this is happening reliably, you can work on transitioning that skill to occur in different settings and positions, such as sitting in a rocking chair.

Bottle nipples

Try a few, not dozens: If you’ve had any success with a particular bottle nipple, stick with that one. It’s generally not an issue of trying 20 different bottles/nipples until you find the magic one that baby will accept. It does make sense to try a few but then try working with the one you think baby did the best with.

Nipple flow rate: The flow rate can be another helpful factor. I usually recommend a slow-flow bottle nipple for most breastfed babies, but if you know that your baby gets a lot of milk at the breast in a short amount of time (for example, if you have a heavy milk letdown), then you might want to try the next flow rate up (size 1-2 or 3+ month size). Just make sure to hold her upright and keep the bottle almost horizontal, so she doesn’t feel flooded out with too much milk if she does start sucking.

Latex or Silicone? Bottle nipples are usually available in two different materials. Even with the same shaped bottle nipple, a latex (tan-colored) nipple will feel softer and squishier than a clear, firm silicone nipple. It’s worth trying both latex and silicone to see if your baby has a preference regarding texture and firmness.

Read more on Selecting a Bottle Nipple.

Tease-Remove Technique

Have you seen your baby, sound asleep still attached at the breast, barely flutter-suckling, body relaxed, arms limp? Yet, the moment you try to break the latch and take baby off the breast, he’ll start sucking frantically, like saying “wait – wait – no – don’t take that away, I wasn’t done!” Try eliciting that response with the bottle nipple: when you feel baby tentatively latching on the nipple, gentle traction back as though you’re teasing to take the nipple away. Some babies will respond by sucking harder to draw the nipple back in and keep it there. If this happens, try using some movement and distraction (quick!) and see if baby will continue sucking and get into a suck-swallow-breathe pattern. Remember to always aim the tip of the bottle nipple toward the roof of the baby’s mouth.

Milk for the Discerning Palate

Some babies are very particular about what’s in the bottle. Try using freshly expressed milk, if your baby has been refusing frozen. And, though I’m not usually particular about the temperature of the milk offered (most babies don’t mind lukewarm or even cool milk), if you have a bottle-refusing baby, try making the milk quite warm. For some reason, very warm milk seems to work better for many babies who are reluctant about the bottle. If your baby is over four months old, you could consider trying one ounce of white grape juice and one ounce of water. Some babies will initially refuse milk, but readily take juice from the bottle. Though the recommendation is exclusive breastmilk close to six months, other pediatricians (and certain groups within the AAP) do suggest solid foods (cereals, fruits and vegetables) any time after four months. Again, this is an untraditional approach (and I’m not one to encourage juice intake, especially from a bottle!), but one that may help bridge the ability to bottle feed an older baby.

Recruit a Confident and Experienced Feeder

Have a very experienced bottle-feeder offer the bottle. A professional caregiver who feeds many babies regularly or a friend or fellow new-moms-group attendee who bottle feeds her own baby may have body language, tricks and methods that you or your partner haven’t yet tried. Make sure s/he knows NOT to force the bottle, and that it’s perfectly alright if it doesn’t end up happening that day. You don’t want her to push too hard in her attempts to be successful and save the day! Experiment with sitting right in front of your baby so she can see you, or leaving the room or having the caregiver walk around in another room while offering the bottle.

Don’t Try a Holding out Game

Do not attempt to withhold the breast for an extended period in order to force the baby to take the bottle out of hunger. It is unkind, unnecessary, and usually unsuccessful, especially if baby has not been able to successfully transfer milk from the bottle before. Slow, consistent, unstressed encouragement tends to yield the best longer-term success.

Which brings us to perhaps the most effective and successful technique: Intermittent Bottle By Mom (IBBM)

Intermittent Bottle by Mom

One less-traditional, but highly successful technique I find works well is to have mom work on the bottle feeding since you are the person your baby most associates with feeding, and you are both comfortable and relaxed together. Also, you have the “luxury” (ha!) of time in the morning to work together over several subsequent feeds, whereas your partner is usually trying to work on bottle feeding in the evening during the hardest time of the day, when no one has much energy or patience left.

During an early morning feeding, begin nursing at the breast as usual, and then interrupt the breastfeeding and offer the bottle. If she doesn’t accept the bottle, don’t force it, just put her right back on the breast for another minute or two, and then try once again with the bottle. Go back and forth between the breast and bottle without forcing it at her. Try to have the attitude of “you can get milk here (breast), you can get milk here (bottle), it’s all milk, it’s all good, either is fine!”. Pretend like you don’t mind if she refuses the bottle, just put her back on the breast. If she ends up not taking any of the milk at that early morning feeding, you can leave it on the counter (or refrigerate and rewarm) and try again at the next feeding, 2 hours later before deciding to toss it – that’s why I suggest only using an ounce or two of milk in the bottle, so you won’t be wasting much if she refuses it altogether.

Try this Intermittent Bottle By Mom (IBBM) technique for several feedings during the day, for several days in a row. Remember, never let baby get distressed with this method: If she resists or refuses the bottle, allow her to go right back to the breast. Almost always, moms begin to see success by day 3 or 4, and by 7 – 10 days, baby is often readily taking an ounce or more from the bottle. Success!

Introducing the Bottle to your Breastfed Baby: Feed the Baby but Protect the Breastfeeding

Focus on Breastfeeding First

bottle feed 2During the first few weeks after birth, just focus on getting breastfeeding up and running – that’s enough. You may need to express milk in certain situations, but in general, just work on establishing a comfortable nursing relationship and milk supply through breastfeeding. Once breastfeeding is well established, you may consider expressing some breastmilk and introducing the bottle, perhaps around week three or four of your baby’s life.

Why 3 to 5 weeks?

A newborn’s sucking is reflexive until about 5 to 6 weeks, so introducing the bottle between 3 to 5 weeks is an optimal time, if bottle-feeding skills are required. Most babies will accept the bottle without much difficulty when it is introduced between 3 to 6 weeks. It may be more challenging to wait until later before introducing the bottle. Of course, not all babies need to take a bottle, and many babies can begin learning to drink from a spouted cup as early as 4 to 5 months, but this post is focused on parents who do want to introduce the bottle to their breastfed infant. Beginning to express milk around week three or four may establish and maintain a strong milk supply, if storing milk for the return to work is desired. Slowly beginning to store several ounces of milk every few days once baby is about a month old,  will gradually create a stash of back up milk you’ll appreciate once you’re back at work.

Relax: Offer, Don’t Push!

Introduce the bottle in a stress-free, low-pressure manner. Let your baby draw the bottle nipple into his mouth – don’t force the nipple into the baby’s mouth. Try stroking the bottle nipple against baby’s cheek, then lips. See if he’ll turn slightly or open his mouth to seek out the nipple – called the rooting reflex. When the bottle nipple enters the baby’s mouth, angle the tip slightly upward, toward the roof of the mouth rather than pushing the nipple against the tongue.

If your baby cries or resists, take a break or try again later or the next day. Avoid creating a struggle or reinforcing a negative association with bottle-feeding.

Use Expressed Milk

If your baby is exclusively breastfed, don’t casually introduce formula “just to see if he’ll take it” or “to get him used to it”. This introduces foreign proteins (cow’s milk protein, or soy) unnecessarily, and also interferes with the breastfed infant’s normal intestinal flora. There is something very special and beneficial about the immune and digestive system of an exclusively breastfed baby. Avoid introducing anything other than breast milk during a baby’s early months unless medically necessary.

Offering the Very First Bottles

When preparing the very first bottle for a breastfed baby, start with just one ounce of expressed milk. This way, you won’t end up wasting milk if baby doesn’t take the bottle, or doesn’t finish a larger amount. If you’re offering just an ounce and baby finishes it and seems to want more, you can either offer another ounce, or put baby to the breast to “finish” their meal.

Continue offering a small (one ounce) bottle each day until the baby seems fairly comfortable with the bottle feeding process and finishes it reliably, then gradually increase the volume, moving to 1.5, then 2, then 2.5, then 3 ounces over several weeks’ time.

Three to four ounces of milk, given over 15-30 minutes, should be plenty for most babies at 2 to 4 months. Babies gradually increase their volume slowly over the next few months, typically “maxing out” around 5 to 6 ounces at 5 to 6 months. Don’t be in a rush to increase the milk volume just because your baby finishes the bottle. If the volume seems to keep him content for a couple of hours, it’s probably the right amount of milk. Babies love to suck, and enjoy milk, and will often take more milk than perhaps they actually need, if it is continually offered. Finishing a bottle or being willing to drink more doesn’t necessarily mean your baby is still hungry.

Helping Your Baby Adjust to the Bottle

Some babies will take a bottle easily the first time, while other babies require more time to become comfortable with accepting a very new way to eat. Be patient, calm, positive and consistent. This is a new skill for your baby (and for you). Consider this: If we took an exclusively bottle fed baby and put him to the breast, would we expect him to know exactly what to do the first time, without prior experience or practice? He might, but far more likely, would take a little time to get used to this new way of eating.

Some babies are more willing to drink from a bottle when drowsy, or when not frantically hungry. You might try nursing for a few minutes, then switching to the bottle half-way into the feeding.

Some babies are more willing to take the bottle from someone other than mom. Have a family member or helper try offering the bottle, either while sitting, or while walking around the room with the baby sitting up and facing out – the movement and distraction may be helpful.

Some breastfed babies are more willing to take the baby from mom, since they already associate mom with milk and with feeding. See more tips for the reluctant bottle feeding baby.

What counts as “Taking the Bottle”?

Offer the bottle once a day until your baby seems to begin drinking an ounce or two easily (this may be the very first and second tries – right off the bat.). Then you may switch to one bottle every other day or so. It’s a good idea to offer one bottle every couple of days so that your baby remains comfortable with the skill.

If your baby can drink an ounce from the bottle without difficulty, that is successful. If they are able to transfer milk from the bottle effectively (and the skill remains familiar with regular practice), they have the ability to drink more if necessary, even if they don’t particularly love the bottle.

Beware of the Bottle Feeding “Vacation”

One of the biggest anxieties for a new mom as her return to work approaches, is the baby who will not take the bottle. If it’s important to you that your baby be able to drink a bottle reliably, make sure to keep it familiar. Don’t assume that because baby drank the bottle once, many weeks ago, it’s a checkmark in the “will-take-a-bottle” box and the skill will be retained indefinitely. This skill needs be kept familiar or all bets are off.

Avoid the “bottle feeding vacation” or going 5 or 7 days without a practice bottle. Some babies will do fine with a rare or occasional bottle, but other babies, even those who had previously taken a bottle readily, will refuse after many days “vacation” when the bottle is re-introduced. Once the bottle is introduced, keep it familiar. Every other day, or about 3 or 4 bottles a week is usually enough to do so. If you don’t need to do a full feeding with the bottle, just one ounce in the bottle is enough to “count” as practice to keep it familiar. Give the ounce, and then finish the feeding at the breast.

Paced, Responsive Feeding Positions

Encourage family members and caregivers to bottle-feed with close physical contact, change positions several times throughout the feeding, and pause often to interact with your baby.

Babies should be bottle-fed in a semi-upright position with the bottle nipple almost horizontal (though filled with milk). This allows the baby to better control the flow and avoid being overwhelmed by too much milk. In the typical “reclined and cradled” bottle feeding position, the bottle milk will flow faster by gravity, and baby will need to drink faster in order to keep up with the flow. The more upright position will help pace the feeding better.

When baby pauses to rest or take a deeper breath, this is a cue for the care-giver to remove the bottle, talk to the baby, burp or take a little break from the bottle feeding. There’s no need to pull the bottle away from a baby who is actively sucking happily just because it’s been five minutes, or one ounce. Instead, wait for a natural pause to remove the bottle for a break, engage with eye contact or interaction, or a burp.

Remind caregivers to never prop a bottle – this can lead to choking or aspiration of milk. Babies deserve physical and social interaction during feeding. Finally, don’t put an older baby into a crib with a bottle of milk or juice. This is associated with increased incidence of ear infections and tooth decay.