Category Archives: solids

Diaper Surprise! 12 Freaky Things to See in Baby’s Diaper during the first year

Changing your baby’s diaper may feel a bit like unwrapping a surprise gift or delicately defusing a small package bomb. You’re never quite sure what’s inside until its too late, and the contents may shock you, amuse you, or make you run for Dr.Google.

Don’t underestimate the fascination you may have with your baby’s diaper contents. Embrace this stereotypical new parent obsession, though do try to limit detailed diaper discussions to other new parents, and those who feign polite interest without turning white or audibly gagging.

Surprise! Here are 12 freaky things you might find in your baby’s diaper during the first year:

Day 3: Brick dust (uric acid crystals) – a rust or pinkish colored residue staining the front of the diaper. This resolves as baby’s urine becomes more dilute.

Week 2: Gel crystals. These look like oversized grains of sugar stuck to your baby’s genitals. Don’t panic – they’re not coming from your baby! Instead, they’re from the absorbent lining escaping from tiny tears in a disposable diaper.

Week 6: Green spinachy-looking poop. Like the occasional random projectile vomit, these bizarre baby things sometimes happen, possibly on days when baby is nursing more than usual. Unless it’s frequent, frothy, with mucus and blood, don’t worry about occasional green poop in the diaper.

Month 3: Nothing. No poop. Nada. Perhaps several days or even a week may go by with nary a stool. Perfectly normal for breastfed babies, as long as baby is content and pee is plentiful. No need to intervene. What goes in will eventually come out (and usually at the least opportune time and in abundance), so be fully prepared for a poop explosion.

Month 4: Containment Failure or Blow Out. When baby is in a seated position (car seat, bouncer, baby carrier) there’s really only one place for poop to go, and that’s UP. Tell-tale sign of the Blow Out is a yellowish wet spot located at the small of the baby’s back. Usually involves a complete change of clothes, bath optional. For both of you.

Month 5: Mom’s hair (because it’s falling out everywhere). Tip: Time to get a short, sassy hair cut. Hint: Beware the Hair Tourniquet.

Month 6: Slimy mucus in poop when baby has a cold. Swallowed mucus isn’t absorbed by the GI tract and will pass through unchanged into the diaper with poop.

Month 8: Little black threads which look exactly like tiny worms. These are from baby eating fresh bananas (not jarred). They’re just like the little black strings you see in homemade banana bread. Mmm. Banana bread.

Month 9: Gas-mask worthy smells. The strongest odors yet are typically from introducing more protein foods. Whew. Just. Wow.

Month 10: Bits of paper are likely from the tag she was chewing in the store or cardboard from gnawing on the corner of a board book. Paper is one of the four basic food groups of mobile babies. Bonus points if you can still read a letter or word.

Month 11: Easily identifiable bits and pieces of food. Oh, there’s a blueberry! Hey, look, a lima bean! Tip: If you want to know how long it takes for food to make it through your baby’s digestive tract, feed baby some corn. My estimation is you’ll see it again in about 18 hours.

Month 12: Poop that looks (and smells) just like big-people poop. If it’s not too squashed, you can shake it into the toilet instead of sealing it up in the diaper. The more solid food your baby eats, the more their poop will start to look more “familiar”.

Bonus – 18 months: Brightly colored flakes – from that crayon you needed to pry out of your toddler’s mouth. Makes for some pretty poop, though!

Introducing Solids: Traditional Methods and Alternatives

Introducing Solid Foods, Part 2gerber

The “traditional” method of introducing solid foods has been around for decades: spoon feeding single-ingredient, pureed “baby foods” and gradually increasing variety and texture as baby becomes older.
As we discussed in part one, the “Traditional” method of introducing foods to infants in the US is actually unsupported and increasingly contradicted by research, and may be gradually falling out of favor. Even so, most pediatricians and baby books still recommend a slow and careful introduction of spoon-feeding specific pureed foods and avoiding others.

The “Feed Baby Almost Anything” Method
Several alternatives to the “traditional” method exist. One option is to continue to offer pureed or modified table foods but introduce a much wider variety of food types and flavors (including egg, fish, wheat and combination foods) sooner. Earlier exposure to these foods, rather than avoiding them, may actually help reduce the risk of allergy and celiac disease. Dairy foods and protein foods (pureed meat) are also offered much earlier than in the traditional method. Check with your pediatrician for specific advice.

Baby-Led Weaning (or, Baby Self-Feeding)
Another option rising in popularity is called “Baby-Led Weaning”. I’d prefer to call it “Baby Self-Feeding” because here in the US, “weaning” commonly refers to the reduction or stopping of breastfeeding. In Europe, where Baby-Led Weaning first became popular, “weaning” refers to the introduction of solid foods. This method is all about allowing a baby to explore food on her own terms and gradually learn to chew and swallow. Spoon-feeding purees are not used, and the saying “Food Before One is Just for Fun” narrates the attitude that the amount of food the baby eats may be minimal, and that’s ok. We’ll talk more about “finger foods” vs Baby-Led Weaning/Baby-Self Feeding in Part 3.

Traditional Method of Introducing Purees:
If using this method, it is common to first introduce a cereal, then an orange vegetable, a green vegetable, and then a fruit. Then, simply alternate remaining single-ingredient fruits and vegetables one by one, adding one new food every few days until all of the following have been introduced. This should take several weeks or a month. Remember, there’s no rush or reason to push. These foods aren’t particularly nutritious, are less caloric than your baby’s milk, and won’t help your baby sleep longer: in fact, feeding too close to bedtime can cause gas and digestive upset.

Cereals, Iron-Fortified: Oatmeal, barley cereal, brown rice cereal, mixed with breastmilk, formula (if already introduced) or water.
Vegetables: Carrots, sweet potatoes, winter squash, peas, green beans, beets.
Fruits: Applesauce, peaches, pears, apricots, plums/prunes, bananas, avocado.

Continue to offer cereal at each meal, along with the fruit and/or vegetable. Cereal is the bulk and the main calorie source of the “meal”. The vegetables and fruits are fairly low in calorie and high in water. Peas, bananas, avocado, sweet potato are about twice as caloric than green beans, carrots, winter squash, applesauce, peaches, pears.

Remember that your baby’s milk source is still their primary source of nutrition and is a complete food, and in fact is more caloric and nutritious than these “solid foods” you’re offering. 4 ounces of breastmilk contains about 100 calories and the perfect mix of fats, proteins, vitamins and minerals for your baby to grow. 4 ounces of applesauce or pureed carrots contains less than half the calories of breastmilk or formula, and only trace nutrients.

Try to avoid any tension or struggling over feedings and do not push to finish the portion or play the “just one more bite” game. You have far too many years of feeding your child ahead of you to create struggles over food!

Dairy foods are traditionally offered starting around 7 months (unless there are special concerns about cow’s milk protein sensitivity – check with your pediatrician). Start with whole-milk (full fat) plain yogurts. You may feed it plain or stir in some pureed fruit.

Protein foods are usually introduced next, around 7 to 8 months- pureed chicken, turkey, beef, tofu, egg, small amounts of low-mercury fish like scrod and salmon. Check with your pediatrician for recommendations about giving whole egg vs. egg yolks, and if fish or shellfish should be given or avoided.

Purred meats are thick and pasty. Try adding a tablespoon of pureed chicken to applesauce and feed it alongside a vegetable or cereal.

Again, these suggestions follow the “traditional method” of introducing solid foods, and many experts feel they are outdated and unnecessary. However, they are still the most common recommendations given by pediatricians and baby care books, and many parents feel most comfortable using this traditional method as a guide.


Next up: Making or Buying Baby Foods, Is Organic Important, Finger Foods and Baby Led Weaning


Introducing Solid Foods

"Give Peas a Chance"!
All we are saying, is “Give Peas a Chance”!

Rice cereal at four months or at six months?
Or, don’t start with cereal at all – instead, offer avocado or sweet potato to begin.
Don’t give egg whites, wheat or fish during first year, and only introduce one new food at a time. Offer pretty much anything, including traditional allergens, any time after 5 months.
Spoon feed purees. Don’t spoon feed purees, instead, let baby learn to feed herself. Don’t let baby feed herself, she’ll choke. 

When it comes to the topic of introducing solid foods, there are so many conflicting recommendations and opinions, even among the experts and research.

For the past 50 years, the common advice has been along the lines of “sometime between 4 to 6 months, introduce rice cereal (oatmeal if baby becomes constipated), then orange and green vegetables and pureed fruits, one at a time.” It’s possible that all of that is wrong, but on the other hand, going that route may not hurt, either. Yes, it’s clear as mud…

The American Academy of Pediatrics’ recommendation is for exclusive breastfeeding for the first six months of life, (iron-fortified infant formula if breastmilk is not available), with iron-fortified solid foods introduced gradually thereafter to complement the milk intake. This message has been the same for the past 15 years, and reaffirmed in a 2012 policy statement, yet, you will find many conflicting recommendations about when to begin solid foods, how to feed your baby, and what to foods to start with or avoid. Your pediatrician may give you suggestions that are very different from what your friend was told by her pediatrics practice. Some recent research questions the typical recommendations to introduce foods in specific orders and avoid common allergenic foods like egg whites and wheat. It’s possible that delaying the introduction of these foods could actually be causing more allergies, rather than fewer.

What introducing solid foods is all about: Socializing baby to the feeding experience, introducing new flavors, textures and oral motor skills.

What introducing solid foods isn’t really about: Packing in foods in hopes that he’ll sleep better.

Signs of readiness: Typically around 5-6 months, you’ll notice your baby watching, grabbing, and otherwise showing interest in your own meals and snacks, and she should be able to sit up with support. The best sign of readiness, however, is that once you do begin offering food, your baby gets the hang of it within a few “meals” or over the course of a week: quickly learning to open mouth for the spoon, seeming interested or eager, reaching for it, wanting more. If your baby seems to find it unpleasant and fusses, squirms away, gags or extrudes most of the food back out repeatedly, continue to offer, but don’t push or force your baby to put food in his mouth. If after three or four “meal” attempts, it is not going well and your baby is not enjoying the experience, shelve the food and try again several days or a week later. It’s okay to have a false start and then wait another week before “re-starting”.

Often a baby is happy just to have a bowl and spoon to play with, and to join you at the table in a highchair. Sometimes they want the “tools of the trade” but not necessarily the food just yet. There’s no rush: once your baby starts eating, he’ll be eating for the next 90 years. A few more weeks won’t make any difference.

How much should my baby eat? Some babies sample only a teaspoon or tablespoon of oatmeal or avocado at a meal, while others will eat an entire bowl of cereal and fruit and holler for more when it’s done. Follow their cues; don’t push them to eat more than they ask for. When she leans forward and continues to opens her mouth for the spoon, continue feeding. When her mouth is closed and she is turning away, she’s done. Try to avoid any tension or struggling over feedings and do not push to finish the portion or play the “just one more bite” game. You have way too many years of feeding your child ahead of you to create struggles over food already!

Give baby her own spoon to hold so she won’t grab at yours (she still will!). Let her suck the food off her hands or plastic spoon or teether. Learning to eat is a tactile, sensory (almost) play experience. Babies first learn to swallow by sucking, so it’s common for babies to put their fingers or a toy in their mouth along with the food, to help organize their swallowing and tongue movements as they employ the more familiar suck-swallow-breathe pattern.

Good first food options:

Whole grain cereals: Oatmeal, barley cereal, brown rice cereal, mixed with breastmilk, formula (if already introduced) or water. Avoid mixed grain cereals as a first food.

Vegetables: Carrots, sweet potatoes, orange squash, peas, green beans, beets.

Fruits: Applesauce, peaches, pears, apricots, plums/prunes, bananas, avocado.

Meats: Chicken, turkey, lamb, beef.

Iron rich foods can be served with Vitamin C (most yellow/orange fruits and vegetables) to enhance absorption. Meats, egg yolks, prunes, sweet potatoes, beans, peas, lentils, and iron-fortified rice, barley or oatmeal cereals are good sources of iron.

Note: Diaper rashes are commonly a reaction to change in pH balance of stool after introducing fruits and vegetables and don’t have to indicate an allergy. Treat with a generous layer of a thick zinc diaper cream, and switch to warm water and washcloths rather than diaper wipes if the skin is very sore or irritated. Facial rashes are commonly due to acidic fruits smeared on the face and frequent washing after meals – use a soft cloth to wash after meals, dry well with a soft cloth and apply a moisture barrier to treat red skin on cheeks and chin.

Interested in this topic? Watch my webinar on introducing and advancing solid foods.

Continue to Part Two of this “Feeding Your Baby” Series:
How and What to Feed Your Baby – Traditional methods and alternatives (jars, homemade purees, baby-led-weaning aka baby-self-feeding).


Tips for New Eaters: Finger Foods

"Bag Cheese" is a real winner here!
“Bag Cheese” is a real winner here!

Are you moving from spoon-feeding purees to starting to offer bits and pieces of food? Here are some tips that address common questions new parents may have during this transition.

1. Not so big. Bits of food for self-feeding should be about the size of your baby’s thumbnail, or smaller than a dime. Bits of toast, waffles, pancakes, French toast, grilled cheese sandwiches and muffin bits are usually well-received by babies and are easy foods for them to manage.

2. Nothing hard, sticky or chewy. Hard foods like raw carrots or apples can be sliced then steamed before offering. Raisins may be soaked in hot water to soften.

3. Avoid round foods and coin-shaped slices. Foods like grapes, steamed carrots, string cheese sticks, hot dogs  (a whole other can of worms) should be chopped small to reduce the risk of choking.

4. Teeth aren’t needed to chew. As long as the foods you offer are soft enough for you to to squish between your thumb and forefinger, your child should be able to chew them just fine with his gums even without molars.

5. Offer a preloaded fork or spoon if your child is eager to feed himself. Reduce frustration by using foods that stick to the spoon (like yogurt) rather than foods that drip off  (like soup). Soft cooked elbow macaroni makes a good introduction to fork feeding.

6. If your baby stuffs too much in his mouth at once (or throws it all on the floor), just offer a few bits on the tray at a time and add more pieces after the first few are eaten.

7. Skip the kids’ menu at restaurants. Offer bits of chicken, baked fish, meatball, potato, rice, pasta, steamed vegetables, baked beans, roll. Make steak “shavings” by scraping at the surface of the steak with a knife.

8. Say “cheese”. Shredded mozzarella or Monterey Jack cheese in the zip-seal pouches (called “bag cheese” in my house) sprinkled on the highchair tray is a speedy snack that can keep a snacking baby busy for awhile.

9. It’s okay to help. Your baby does need to learn how to feed herself, but it’s okay to pop in a bite here and there or spoon feed purees or mashed food in addition to foods your baby picks up.

10. Sensory-Sensitive. Some babies are especially sensitive to the sensation of textures or dislike having their hands dirty. Use dry foods like toast bits, rice cakes or cereal rather than mushy food like banana slices to practice finger-feeding and hand-eye coordination.

Bonus: Respect your baby’s cues and don’t try to push in more food than your baby wants. “One more bite” really won’t make any difference in terms of your child’s nutrition

Oral Motor Muscle Stimulation Exercises… For Babies

This may be cute (sort-of), but it’s certainly not the technique I outline below

Sometimes babies need some help “waking up” all their sucking muscles prior to nursing or taking a bottle. Other babies simply seem to latch or eat solids (purees or textures) better several days after starting these exercises.

Oral Motor Muscle Stimulation massage techniques as follows:

Remember to do each movement several times, with gentle pressure, slowly and deliberately. The entire “routine” should take less than 30 seconds.

  1. Cheek circles (gently move cheeks in circular motion, and inward to make “fishy lips”. Repeat x5
  2. Over the ears and under the jaw. (With both hands, stroke from each cheek to the temples, then around the ears and under the jaw. Repeat x5 )
  3. Trace top lips and bottom lips with finger (“applying chapstick”) x5.
  4. Trace down from nose to lip to chin. Use finger or knuckle to (slowly) gently stroke from bridge of nose down to top lip, bottom lip and chin, gently rolling bottom lip out (only if baby allows) and gently press chin down as if opening mouth (only if baby allows).

Notes:
1. If you are working on tongue extension, remember to stick your tongue way out several times while massaging and praise baby for mimicking the motion.

Does My Baby Need Water? Introducing Cups and Drinks

When the weather gets warm, parents often wonder and worry about their baby’s hydration. During an infant’s early weeks, parents are warned that water is dangerous for babies, so the very idea of putting water in a cup or bottle makes parents nervous even beyond the newborn stage. However, midway into your baby’s first year, offering water in a cup for fun and practice will be a learning activity that helps keep your baby cool (and wet!). What should you know about offering water to your young child?

From birth – 3 months:

No water for newborns. Newborns have tiny bellies, so a bottle of water would take the place of important milk calories needed for growth and development. And because a newborn’s body is small, too much water can alter the normal electrolyte balance necessary for heart and brain functioning. Bottom line, newborns should not be given water. Breastmilk or properly mixed formula will provide the correct balance of liquids needed for hydration and thirst, even when the weather is very hot.

From 4 – 6 months:

Not dangerous, not necessary. An ounce or two of water once a day at this stage isn’t dangerous, but isn’t necessary either. Breastfed babies may nurse for very short periods of time during hot weather, when they are thirsty (rather than hungry) and research shows that even in tropical environments when the weather is above 100°F every day, breastfed babies do not require any additional liquids. For formula fed babies, check with your pediatrician for recommendations. Some pediatricians will suggest offering an ounce or two of water in a bottle if the weather is very hot while others say stick to formula only. Water should not take the place of a breast or bottle feeding, and formula should never be diluted beyond the proper mixing directions in order to offer additional water.

Around 5 – 7 months:

Introducing a cup:
At this age, babies are interested in holding and mouthing objects, and may be ready to explore the skills of drinking from a cup. Choose a sippy cup without a valve initially, so that the cause and effect of tentative sucking pays off with an easy result of water. Pick a small-sized cup of 4 – 6 ounces, because it’s best to fill the cup all the way up to the top so that your baby won’t need to tilt the cup all the way up and lean her head back in order to get water (that’s a lot to coordinate)! A larger cup filled all the way up becomes too heavy for small hands to hold and easily manipulate. Make sure your baby is in a supported upright position when given the sippy cup. Your baby might cough and splutter a bit but will soon learn how to coordinate the sucking and swallowing required for drinking. Your baby might also enjoy squirting the water out of her mouth, and getting wet is part of the process. You can also offer sips from an open cup with assistance.
Water at this age is just for fun and practice. Your baby will still receive full hydration (and nutrition) from breastmilk or formula. Once started, common baby foods including pureed fruits and vegetables are also very high in water content and will add to their liquid intake.

What to put in the cup? Water! Just water.
Give your child a taste for water from early on. Water is the best and healthiest drink for children and adults. Filtered tap water is usually a safe and healthy option. Check with your area’s Department of Public Works to find a link to your town’s water source if you have concerns about lead or other contaminants, or want to know how your water is sourced or tested. Information about fluoride will also be publicly available. Bottled spring water and “nursery water” adds additional expense and environmental waste that may be unnecessary if your tap water is safe for drinking. If it is suggested that you boil water for cooking or drinking, bring to a boil for only 3 minutes, which is long enough to kill bacteria but short enough so as to avoid concentrating any minerals that might be in the water.

What about juice? Wait to introduce, then use sparingly if used at all.
Juice is really just Nature’s Kool-Aid and ounce per ounce, actually contains the same (or more!) sugar and calories than Coke and Pepsi! Sure, juice contains natural fruit sugar, but it’s still just sugar (and a lot of it), adding up to considerable extra calories without offering any significant nutritional benefits. Juice also bathes tiny teeth with sugar and can lead to dental cavities, especially when a sippy cup or bottle of juice – even diluted juice – is sampled frequently throughout the day or night. The concentrated sugar load in undiluted juice can also cause diarrhea or diaper rash.

Think of juice as a treat or add-on, but not as an important part of your child’s daily intake. When used, limit daily juice intake to 4 – 6 ounces a day in total, and dilute juice by 50% (for example, 2 ounces of juice and 2 ounces of water). Even though this reduces the total amount of sugar and calories, it’s still a sugar bath for the teeth.

A good approach is to put only water in a sippy cup for daytime use, and save milk or diluted juice to use at the table during meals, while practicing drinking from an open cup. Keeping to this policy of “only water in the sippy cup” will save you the unpleasant discovery of finding a sippy cup of moldy juice or milk that has rolled under the couch! (And hopefully you find it before your toddler does!)

Interested in this topic? Watch my webinar on introducing cups, straws, milk, “milks”, juice and water (also Baby-Led Weaning is covered in this webinar too)

Introducing the Bottle to your Breastfed Baby: Feed the Baby but Protect the Breastfeeding

Focus on Breastfeeding First

bottle feed 2During the first few weeks after birth, just focus on getting breastfeeding up and running – that’s enough. You may need to express milk in certain situations, but in general, just work on establishing a comfortable nursing relationship and milk supply through breastfeeding. Once breastfeeding is well established, you may consider expressing some breastmilk and introducing the bottle, perhaps around week three or four of your baby’s life.

Why 3 to 5 weeks?

A newborn’s sucking is reflexive until about 5 to 6 weeks, so introducing the bottle between 3 to 5 weeks is an optimal time, if bottle-feeding skills are required. Most babies will accept the bottle without much difficulty when it is introduced between 3 to 6 weeks. It may be more challenging to wait until later before introducing the bottle. Of course, not all babies need to take a bottle, and many babies can begin learning to drink from a spouted cup as early as 4 to 5 months, but this post is focused on parents who do want to introduce the bottle to their breastfed infant. Beginning to express milk around week three or four may establish and maintain a strong milk supply, if storing milk for the return to work is desired. Slowly beginning to store several ounces of milk every few days once baby is about a month old,  will gradually create a stash of back up milk you’ll appreciate once you’re back at work.

Relax: Offer, Don’t Push!

Introduce the bottle in a stress-free, low-pressure manner. Let your baby draw the bottle nipple into his mouth – don’t force the nipple into the baby’s mouth. Try stroking the bottle nipple against baby’s cheek, then lips. See if he’ll turn slightly or open his mouth to seek out the nipple – called the rooting reflex. When the bottle nipple enters the baby’s mouth, angle the tip slightly upward, toward the roof of the mouth rather than pushing the nipple against the tongue.

If your baby cries or resists, take a break or try again later or the next day. Avoid creating a struggle or reinforcing a negative association with bottle-feeding.

Use Expressed Milk

If your baby is exclusively breastfed, don’t casually introduce formula “just to see if he’ll take it” or “to get him used to it”. This introduces foreign proteins (cow’s milk protein, or soy) unnecessarily, and also interferes with the breastfed infant’s normal intestinal flora. There is something very special and beneficial about the immune and digestive system of an exclusively breastfed baby. Avoid introducing anything other than breast milk during a baby’s early months unless medically necessary.

Offering the Very First Bottles

When preparing the very first bottle for a breastfed baby, start with just one ounce of expressed milk. This way, you won’t end up wasting milk if baby doesn’t take the bottle, or doesn’t finish a larger amount. If you’re offering just an ounce and baby finishes it and seems to want more, you can either offer another ounce, or put baby to the breast to “finish” their meal.

Continue offering a small (one ounce) bottle each day until the baby seems fairly comfortable with the bottle feeding process and finishes it reliably, then gradually increase the volume, moving to 1.5, then 2, then 2.5, then 3 ounces over several weeks’ time.

Three to four ounces of milk, given over 15-30 minutes, should be plenty for most babies at 2 to 4 months. Babies gradually increase their volume slowly over the next few months, typically “maxing out” around 5 to 6 ounces at 5 to 6 months. Don’t be in a rush to increase the milk volume just because your baby finishes the bottle. If the volume seems to keep him content for a couple of hours, it’s probably the right amount of milk. Babies love to suck, and enjoy milk, and will often take more milk than perhaps they actually need, if it is continually offered. Finishing a bottle or being willing to drink more doesn’t necessarily mean your baby is still hungry.

Helping Your Baby Adjust to the Bottle

Some babies will take a bottle easily the first time, while other babies require more time to become comfortable with accepting a very new way to eat. Be patient, calm, positive and consistent. This is a new skill for your baby (and for you). Consider this: If we took an exclusively bottle fed baby and put him to the breast, would we expect him to know exactly what to do the first time, without prior experience or practice? He might, but far more likely, would take a little time to get used to this new way of eating.

Some babies are more willing to drink from a bottle when drowsy, or when not frantically hungry. You might try nursing for a few minutes, then switching to the bottle half-way into the feeding.

Some babies are more willing to take the bottle from someone other than mom. Have a family member or helper try offering the bottle, either while sitting, or while walking around the room with the baby sitting up and facing out – the movement and distraction may be helpful.

Some breastfed babies are more willing to take the baby from mom, since they already associate mom with milk and with feeding. See more tips for the reluctant bottle feeding baby.

What counts as “Taking the Bottle”?

Offer the bottle once a day until your baby seems to begin drinking an ounce or two easily (this may be the very first and second tries – right off the bat.). Then you may switch to one bottle every other day or so. It’s a good idea to offer one bottle every couple of days so that your baby remains comfortable with the skill.

If your baby can drink an ounce from the bottle without difficulty, that is successful. If they are able to transfer milk from the bottle effectively (and the skill remains familiar with regular practice), they have the ability to drink more if necessary, even if they don’t particularly love the bottle.

Beware of the Bottle Feeding “Vacation”

One of the biggest anxieties for a new mom as her return to work approaches, is the baby who will not take the bottle. If it’s important to you that your baby be able to drink a bottle reliably, make sure to keep it familiar. Don’t assume that because baby drank the bottle once, many weeks ago, it’s a checkmark in the “will-take-a-bottle” box and the skill will be retained indefinitely. This skill needs be kept familiar or all bets are off.

Avoid the “bottle feeding vacation” or going 5 or 7 days without a practice bottle. Some babies will do fine with a rare or occasional bottle, but other babies, even those who had previously taken a bottle readily, will refuse after many days “vacation” when the bottle is re-introduced. Once the bottle is introduced, keep it familiar. Every other day, or about 3 or 4 bottles a week is usually enough to do so. If you don’t need to do a full feeding with the bottle, just one ounce in the bottle is enough to “count” as practice to keep it familiar. Give the ounce, and then finish the feeding at the breast.

Paced, Responsive Feeding Positions

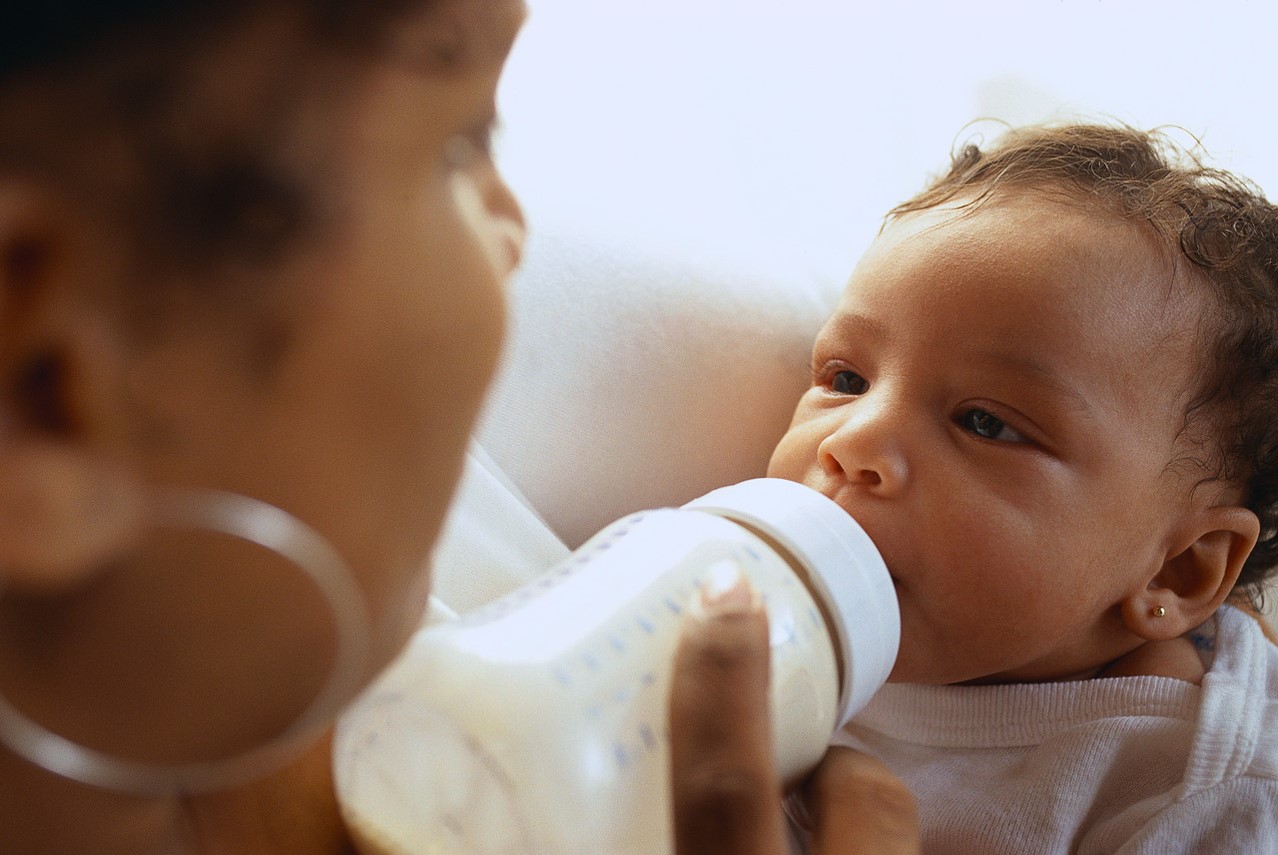
Encourage family members and caregivers to bottle-feed with close physical contact, change positions several times throughout the feeding, and pause often to interact with your baby.

Babies should be bottle-fed in a semi-upright position with the bottle nipple almost horizontal (though filled with milk). This allows the baby to better control the flow and avoid being overwhelmed by too much milk. In the typical “reclined and cradled” bottle feeding position, the bottle milk will flow faster by gravity, and baby will need to drink faster in order to keep up with the flow. The more upright position will help pace the feeding better.

When baby pauses to rest or take a deeper breath, this is a cue for the care-giver to remove the bottle, talk to the baby, burp or take a little break from the bottle feeding. There’s no need to pull the bottle away from a baby who is actively sucking happily just because it’s been five minutes, or one ounce. Instead, wait for a natural pause to remove the bottle for a break, engage with eye contact or interaction, or a burp.

Remind caregivers to never prop a bottle – this can lead to choking or aspiration of milk. Babies deserve physical and social interaction during feeding. Finally, don’t put an older baby into a crib with a bottle of milk or juice. This is associated with increased incidence of ear infections and tooth decay.